Your First Machine
This guide walks you through bootstrapping, configuring, and provisioning your first machine with Durantic.
Prerequisites
- A Durantic account (see Account Setup)
- A machine with network access (bare metal, cloud VM, or edge device)
- The default Docker Image URL configured in Account Settings
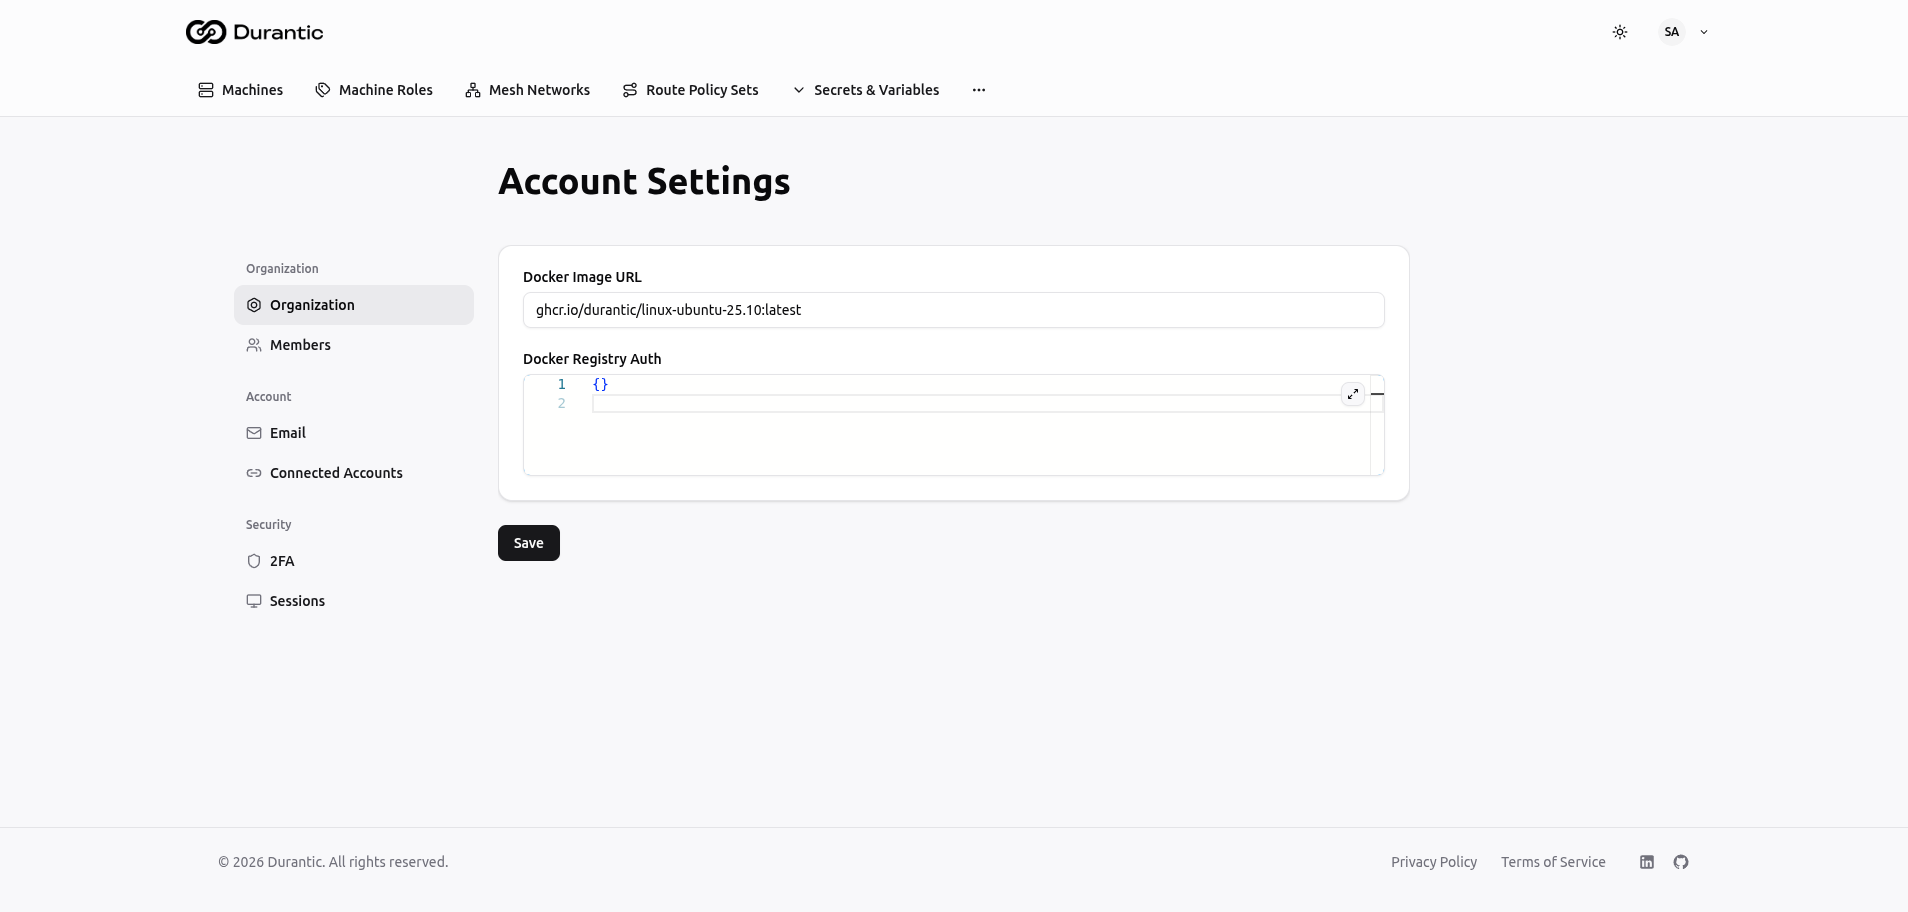
Step 1: Configure Your Account
- Click your avatar in the top-right corner and select Account Settings
- On the Organization tab, set the Docker Image URL to your OS image (e.g.,
ghcr.io/durantic/linux-ubuntu-25.10:latest) - If your registry requires authentication, add credentials in Docker Registry Auth
- Click Save
Step 2: Create a Mesh Network
- Navigate to Mesh Networks in the top navigation
- Click Create
- Enter a name (e.g.,
production) and a CIDR range (e.g.,172.30.0.0/24) - Enable Default so new machines automatically join this network
- Click Create
Note: The CIDR range cannot be changed after creation. Choose a range large enough for your expected number of machines.
Step 3: Create a Machine Role
- Navigate to Machine Roles in the top navigation
- Click Create
- Fill in the form:
- Name:
base-linux - Description: Base configuration for all machines
- Merge Priority:
0(lowest priority, applied first) - Template:
- Click Create
Tip: Create an account variable named
admin_ssh_keyunder Secrets & Variables > Variables with your SSH public key before provisioning.
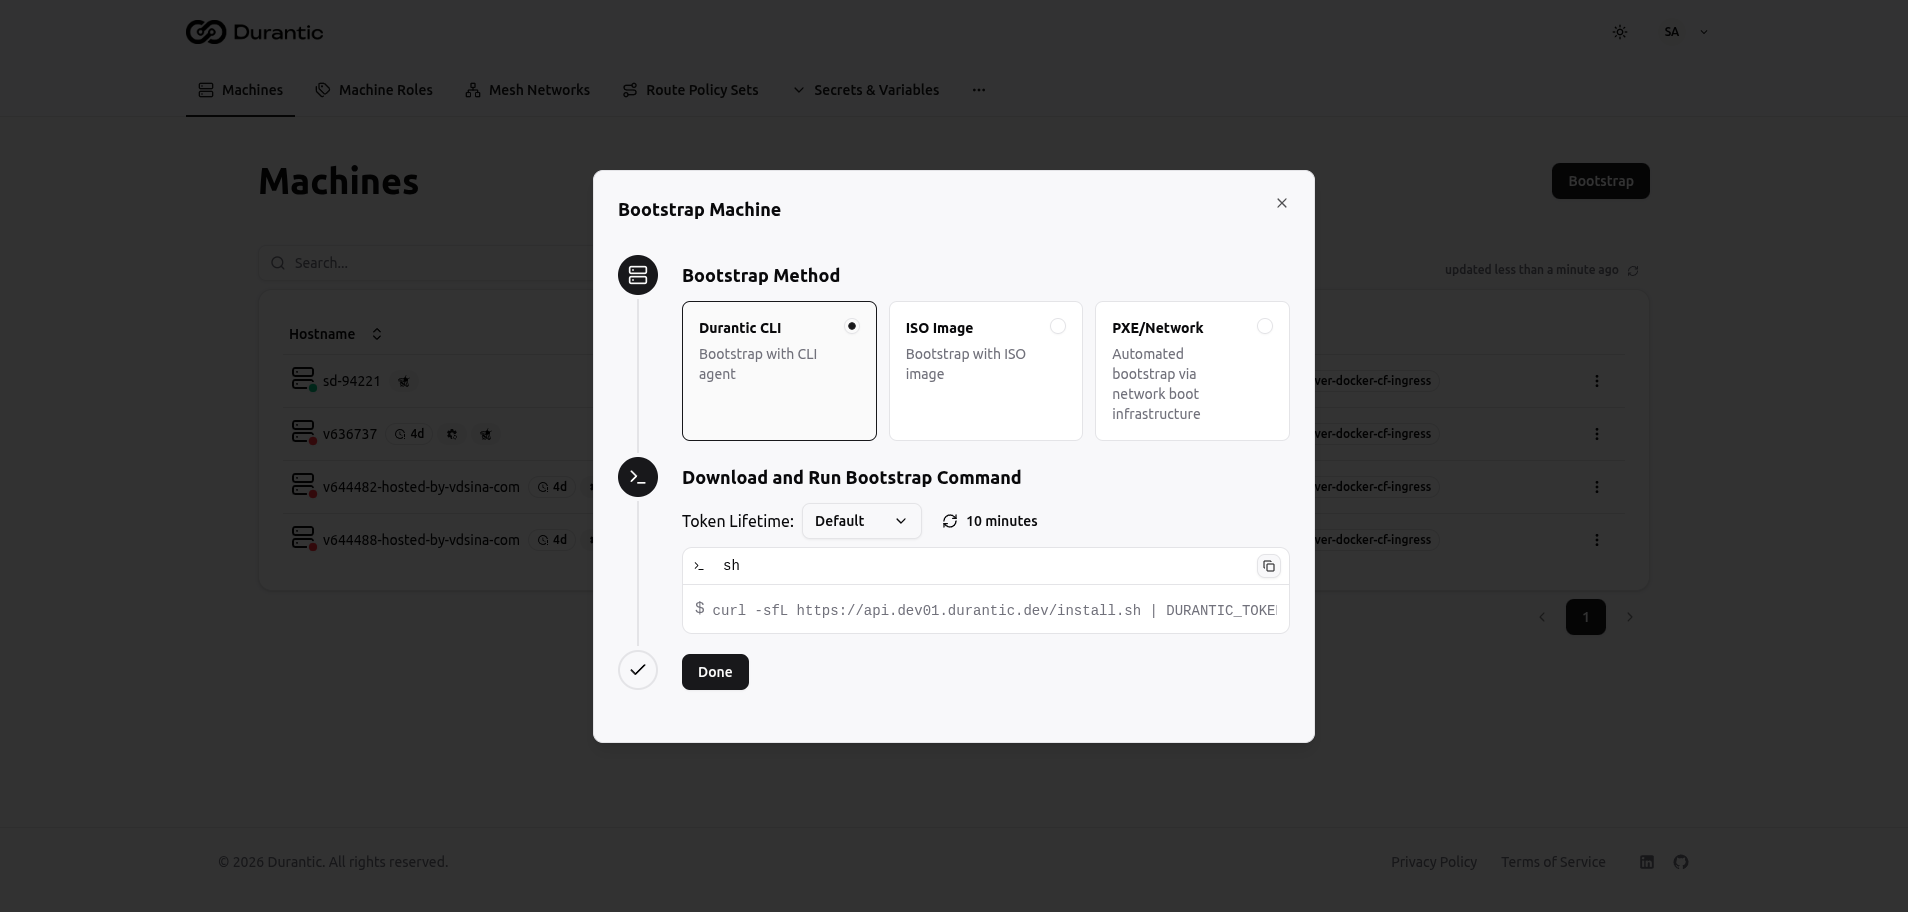
Step 4: Bootstrap the Machine
- Go to the Machines page
- Click Bootstrap in the top-right corner
- Choose your bootstrap method:
Option A: Durantic CLI (Recommended)
Copy the one-line command and run it on your target machine:
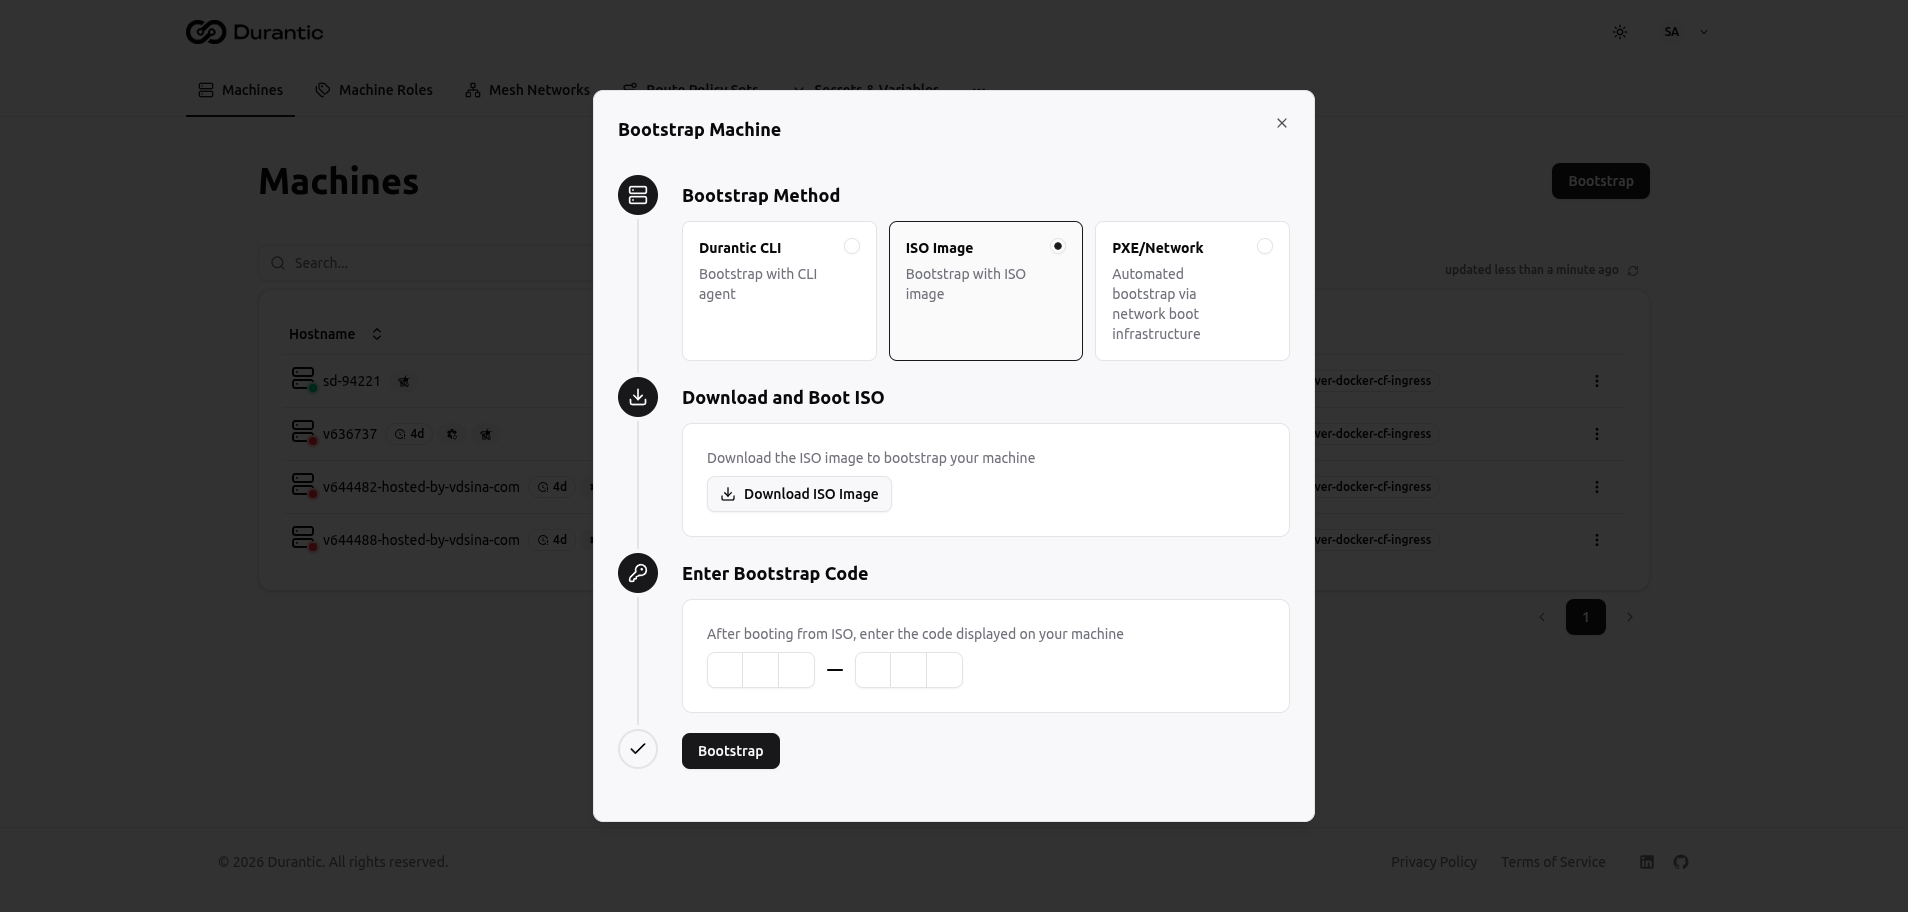
Option B: ISO Image
- Click Download ISO Image and write it to a USB drive or mount it via IPMI
- Boot your machine from the ISO
- The machine displays a 6-character code on screen
- Enter the code in the Bootstrap dialog and click Bootstrap
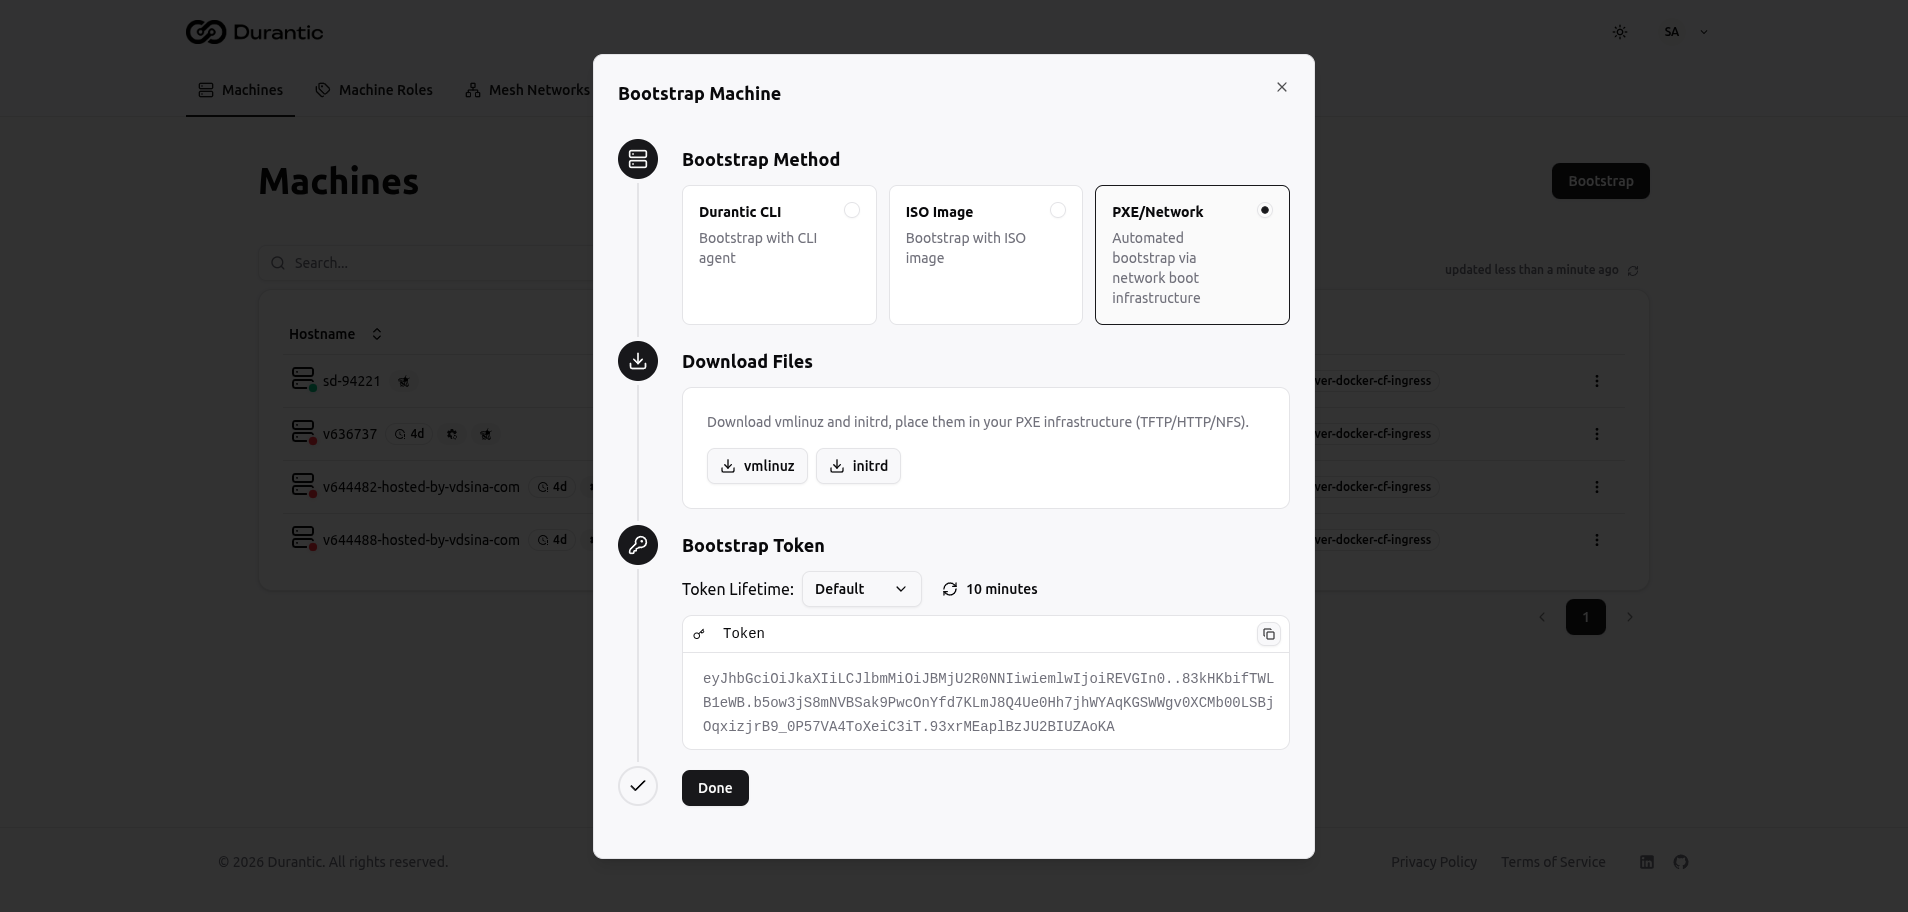
Option C: PXE/Network Boot
- Download vmlinuz and initrd files
- Place them in your PXE server (TFTP/HTTP/NFS)
- Copy the bootstrap token and pass it as a kernel parameter
- Boot machines via PXE
Step 5: Configure the Machine
Once the machine appears in the Machines list:
- Click on the machine hostname to open its detail page
- On the Machine tab:
- Assign the
base-linuxrole under Machine roles - Select the Target Disk (populated from hardware discovery)
- Verify the Mesh Network is set
- Click Update

Step 6: Provision
- Go to the machine's Provisions tab
- Click Provision in the top-right corner
- Confirm the provisioning
The machine will: - Stream the OCI image to the target disk - Apply cloud-init configuration from your roles - Inject the Durantic agent and certificates - Reboot into the production OS
Monitor progress in the Provisions tab.
Step 7: Verify
After provisioning completes:
- The machine shows a green dot (online) in the Machines list
- Check the Hardware tab to see detected hardware
- Check the Network tab for WireGuard IP and mesh connectivity
- Check the Peers tab to verify mesh connections to other machines
- Open the Terminal tab for interactive shell access (requires 2FA)
Next Steps
- Learn about Cloud-Init and Roles for advanced configuration
- Explore Mesh Networking for encrypted machine-to-machine communication
- Set up Remote Access for terminal and command execution
- Configure MCP Integration to manage infrastructure with AI assistants